Table of contents
If you're building a Next.js app (or any web app for that matter), there's a pretty good chance that you'll need to incorporate a form to collect important data from your users.
As ubiquitous as forms are in the context of web apps, their complexity can differ dramatically depending on the use case.
In this guide, we're going to create a very basic form using one of the most popular React (and by extension, Next.js) form libraries: React Hook Form.
Define the Route
In Next.js 14 using the App Router, pages are defined by their route and are initialized with a page.[js|jsx|tsx] file. That means if we want to create a page that we can access by visiting example.com/get-started we have to create /app/get-started/page.[js|jsx] or /app/get-started/page.tsx if using Typescript.
If you're new to Next.js and/or the App Router, check out the App Router and Routing Fundamentals docs.
In the
/appdirectory, create a new folder namedget-startedIn the
/app/get-starteddirectory, create apage.tsxfileCopy the code below into
/app/get-started/page.tsxand save the file
// ./app/get-started/page.tsx

import { SiteForm } from "@/components/site-form";

const GetStartedPage = () => {
    return (
        <main className="flex min-h-screen flex-col items-center justify-between p-24">
            <div className="z-10 max-w-5xl w-full items-center justify-center lg:flex space-y-4">
                <SiteForm />
            </div>
        </main>
    )
}

export default GetStartedPage;
If you save this file and try to access the page in your browser, you'll get an error because we haven't created the SiteForm component yet.
Let's do that next.
Create the Form Component
In the root of the @/components directory, create a new file named site-form.tsx.
Then copy the code below into site-form.tsx and save.
// @/components/site-form.tsx

"use client"

import { useForm } from "react-hook-form";

import { Button } from "@/components/ui/button";
import { Input } from "@/components/ui/input";
import {
    Form,
    FormControl,
    FormField,
    FormItem,
    FormLabel,
    FormMessage
} from "@/components/ui/form";
import {
    Card,
    CardContent,
    CardDescription,
    CardFooter,
    CardHeader,
    CardTitle
} from "@/components/ui/card";

export const SiteForm = () => {

    // Expose the useForm() hook from react-hook-form
    // See https://react-hook-form.com/docs/useform
    const form = useForm({
        defaultValues: {
            name: "",
            url: "",
        }
    });

    // Expose the handleSubmit and control properties
    // from the useForm() hook
    const {
        handleSubmit,
        control,
    } = form;

    // For now, we'll just console log the form values
    // when the form is submitted
    const onSubmit = (values) => {
        console.log(values, "values")
    };

    return (
        <Form {...form}>
            <form onSubmit={handleSubmit(onSubmit)}>
                <Card className="w-[350px]">
                    <CardHeader>
                        <CardTitle>
                            Create Your Website
                        </CardTitle>
                        <CardDescription>
                            Tell us about your new site to get started.
                        </CardDescription>
                    </CardHeader>
                    <CardContent className="py-6 px-0 space-y-4">
                        <FormField
                            control={control}
                            name="name"
                            render={({ field }) => (
                                <FormItem>
                                    <FormLabel>Name</FormLabel>
                                    <FormControl>
                                            <Input {...field} />
                                    </FormControl>
                                   <FormMessage />
                                </FormItem>
                            )}
                        />
                        <FormField
                            control={control}
                            name="url"
                            render={({ field }) => (
                                <FormItem>
                                    <FormLabel>URL</FormLabel>
                                    <FormControl>
                                        <Input {...field} />
                                    </FormControl>
                                    <FormMessage />
                                </FormItem>
                            )}
                        />
                    </CardContent>
                    <CardFooter className="justify-end py-0 px-0">
                        <Button type="submit">Get Started</Button>
                    </CardFooter>
                </Card>
            </form>
        </Form>
    )
}
🤔 What this code does:
Marks the component as
"use-client"since this component relies on client-side interactivity (i.e., state, event handlers). Read more about Client Components in Next.js.Imports the
useForm()hook fromreact-hook-formImports the Button, Card, Form, and Input components we're using to build the UI
Configures the
useForm()hook with default values for our formExposes the
handleSubmitandcontrolproperties from theuseForm()hookCreates a simple
onSubmitfunction that console logs the form valuesRenders a basic form with
nameandurltext inputs
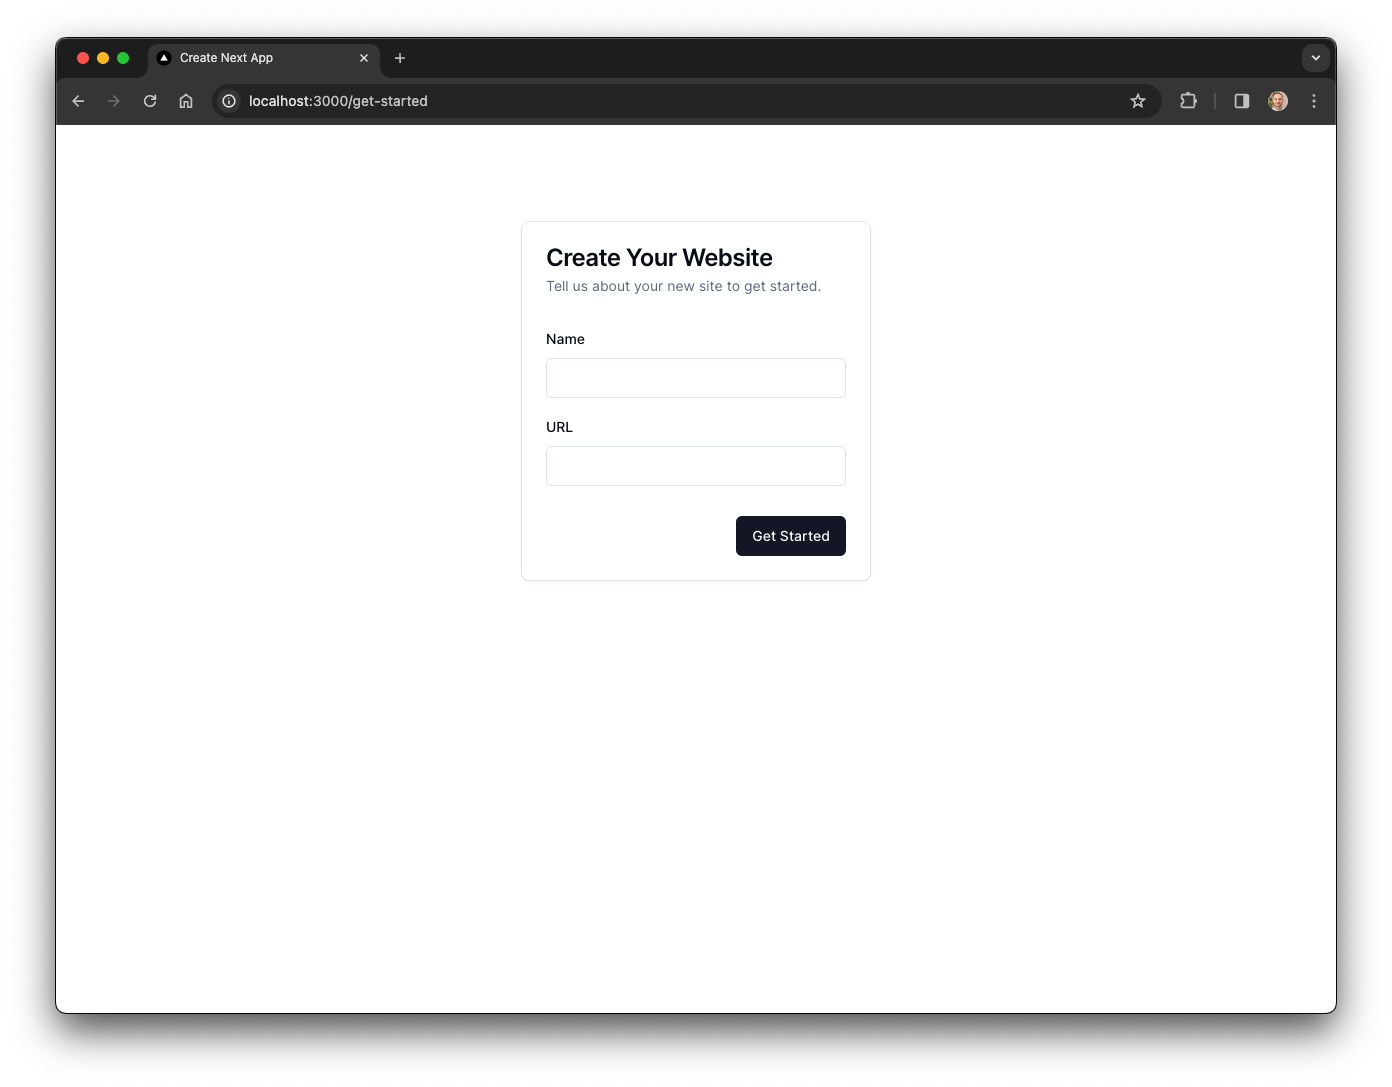
If we reload localhost:3000/get-started we should now see our form:

The form looks great, but it doesn't have any validation. In order to implement validation, we're going to use Zod, which is, in their own words, "TypeScript-first schema validation with static type inference."
Up Next
In my next article, we'll cover the following topics:
Defining a form validation schema with Zod
Using Zod with React Hook Form
Advanced validation methods
.transformand.refineAsynchronous validation with HTTP requests
Rendering custom error messages

